In this tutorial, you will create your first app using App Inventor 2. As discussed in the previous post – How to create apps with App inventor 2, there are 4 steps to create apps. Let us follow the same procedure and create an app.
Designing
1. Signup for App Inventor using a Google account
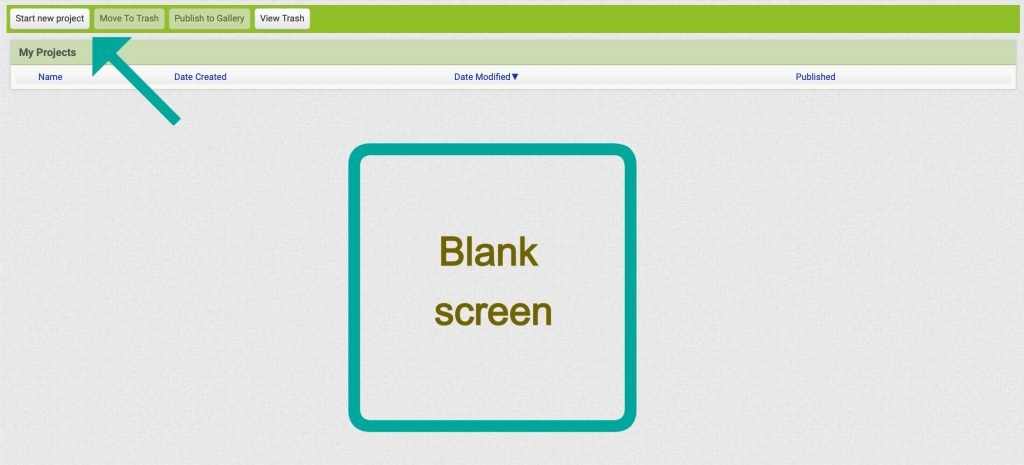
2. You will find a blank and clear space after signing in. It is a projects area where a list of projects that you have created are available.
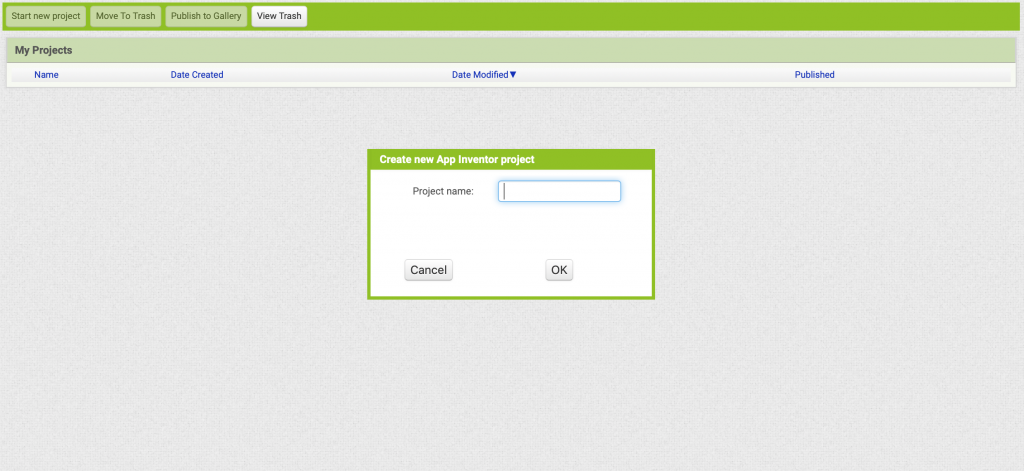
3. You will find a Start new project button on the top left-hand side, click that to create a new project.
4. Now; add a name for your project. The name of a project should follow some rules as shown below:
- It cannot have space between the words or letters.
- It cannot have a special character like % or -.
- It can only contain letters, numbers and underscores. I have added the name as a counter.
On the left-hand side of the Screen, different components are there. They are categorized into different sections like user interface section, layout section, Media section, maps, sensors and more. From the user interface section drag, a label component towards the phone Screen visible at the center(mentioned as a viewer) and drop it there. Now, you must see the label component within the Screen.
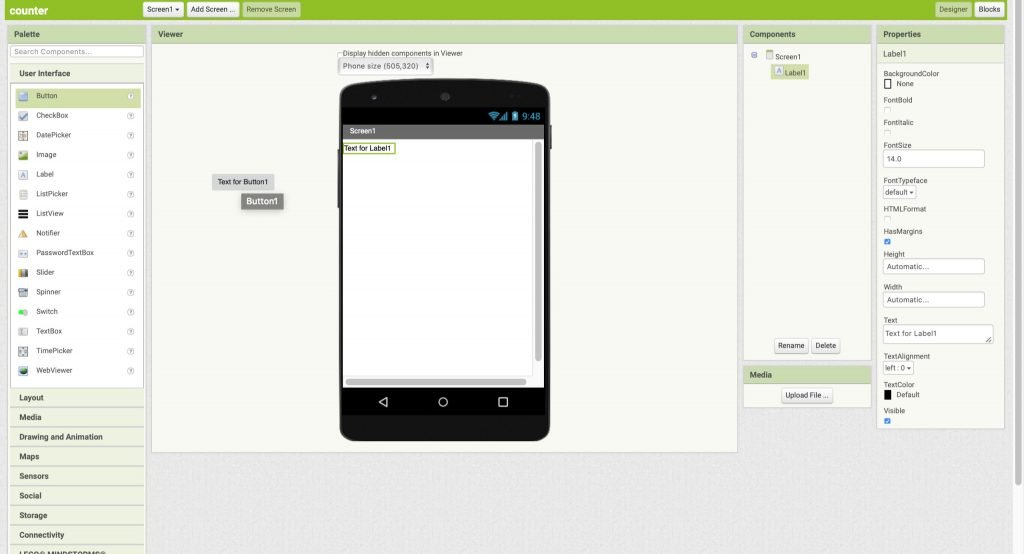
So, this is how you can add components in your app. After that add a button component in a similar manner. Let the Label be above the button hence, move the label component.
Label component is used to show any text on the Screen. And a Button is used to note an interaction and trigger operation.
Now, let us make some adjustments to the design of the app.
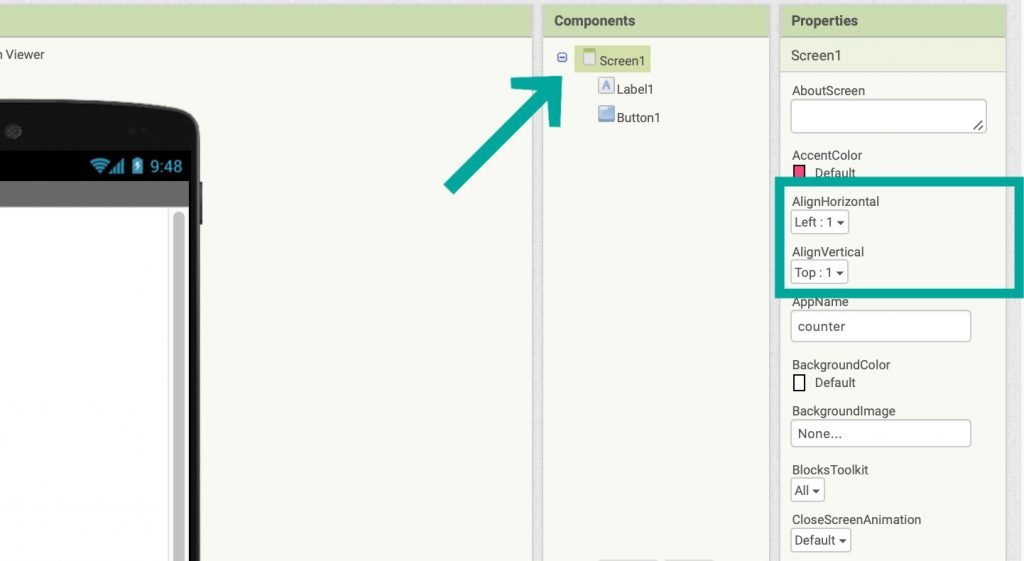
5. From the components section, visible on the Right-hand side Select Screen1 and then; in the properties section change the horizontal and vertical alignment to center. This will change the position of Label and button to the centre of the Screen.
6. Select Label1 component
- In the properties section let us change its Font size to 80
- And Replace the text to “0”
7. Select the Button1 component
- change the text to “+” symbol
- change the Font to “25”.
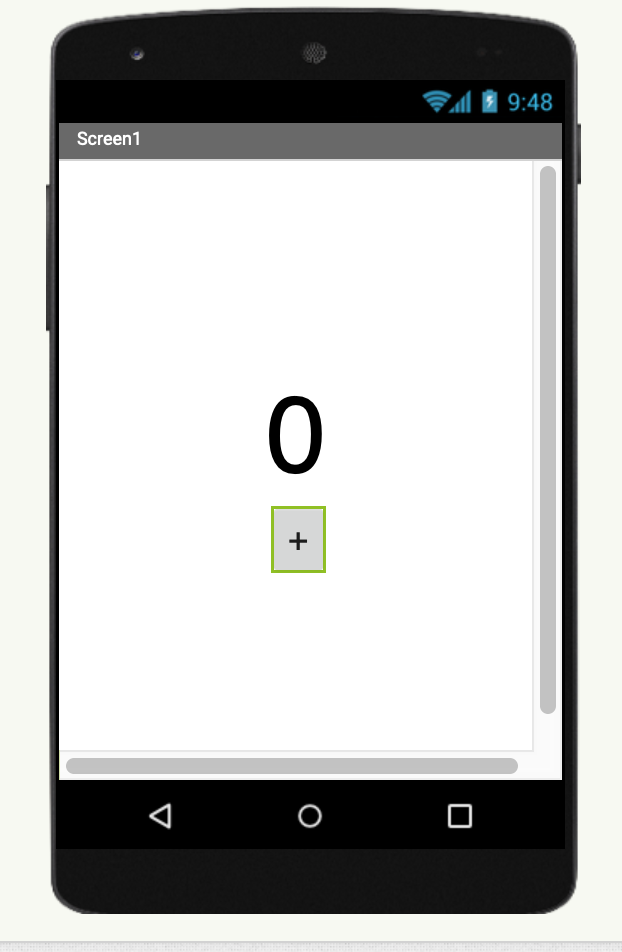
You can see that all the changes that you have made are instantly visible on the Screen.
So, this completes the design process of the app. The components are clearly visible and easy to use. It is good enough, at least for now.
Adding logic through Blocks
let us go to the block section and add functionality using the blocks.
- On the L.H.S
- Select Button1
- Drag the block that says When Button1.Click
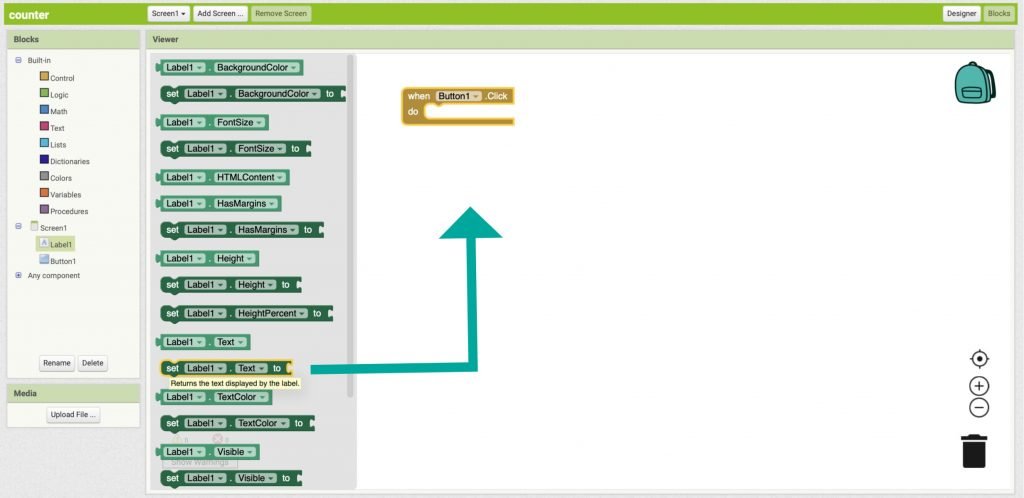
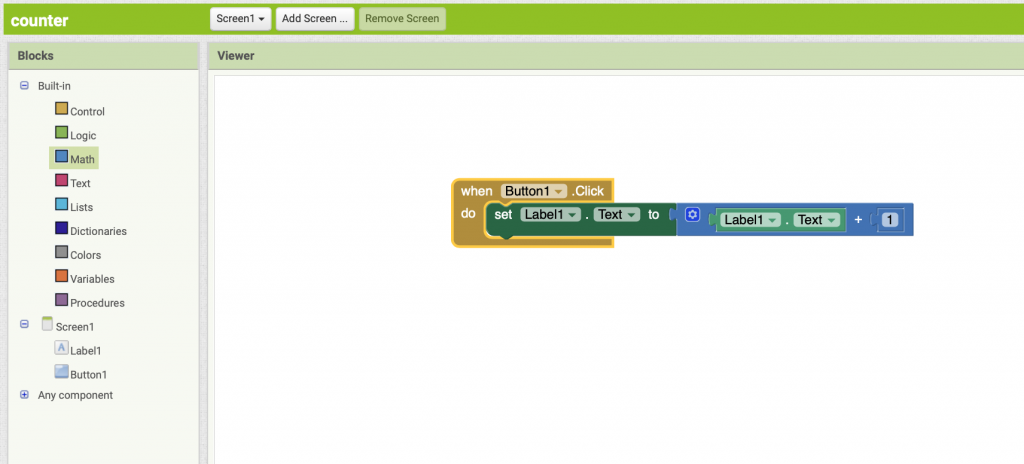
2. After that, Select Label1 and drag a block that says Set Label1.Text to and connect it to When Button1.Click block.
3. From the Math section; drag addition block and connect it to Set Label1.Text to block.
4. Whenever Button 1 is clicked, we need to increase the numerical value of the Label1’s text by 1; hence; we need to first get the current value of Label1.

5. A block i.e; Label 1.Text represents the value being shown by the Label component. Hence, Drag it and attach it to one of the sockets of the addition block.
6. Finally, fill the other socket of addition block with the numerical “1” available in the math section.
Now; after adding the blocks we need to test the app. So, Open the AI companion and now click the Button 1 i.e; “+”
Testing the app
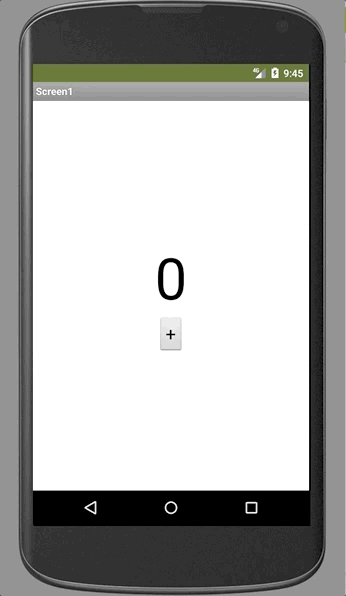
Hurray its working and you have created a simple counter app. Talking about publishing the app at this stage will not be appropriate as we don’t have a good app yet. I will explain it later, before the end of this beginner series.
In the upcoming tutorials, I will explain the concepts and ideas behind the procedure that we have followed here. So, be sure to subscribe us in order to be notified.